How to Sew an Elf Christmas Stocking
The bright and bold colors of these adorable elf stockings are sure to match all of your holiday decor. Plus, the fun pointed toes and bells are guaranteed to put you in the Christmas spirit.

The perfect Christmas craft that even a beginner sewer can make, this sweet elf stocking will be the perfect addition to your holiday decor.
Materials + Tools
- printable elf stocking pattern
- sewing machine
- thread
- scissors
- pins
- 5/8 yard cotton lining fabric
- 1/2 yard cotton exterior fabric
- two fat quarters cotton alternate exterior fabrics
- 5/8 yard mid-heavyweight interfacing or cotton batting
- 12-inch pom-pom trim
- embroidery thread
- two small bells
Cut Out Pattern
Cut out pattern as instructed on these pattern pieces. You should have two lining fabric pieces, two lining pieces in cotton batting or interfacing, two heel pattern pieces, two upper stocking pieces and two lower stocking pieces.

Pin Interfacing
Pin one interfacing/cotton batting lining piece to the wrong side of the fabric lining piece. Baste-stitch around outer edges to secure. Repeat for the other lining and interfacing. Place lining pieces with newly interfaced backs right sides together. Pin around edges. Sew around outer edges, leaving a 5- to 6-inch opening along the bottom of the foot. Do not sew the top of the stocking closed, just around the sides.

Sew Heel
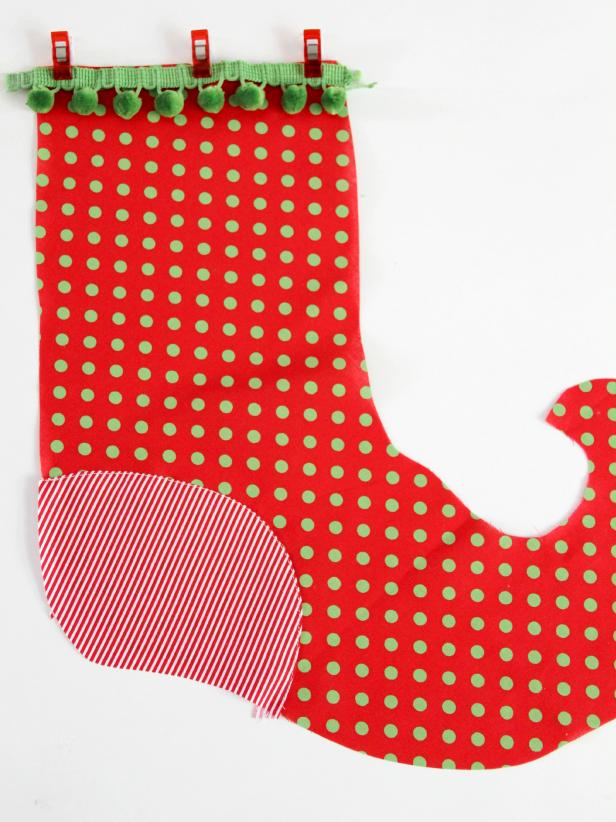
Line up the curved end of the heel piece along the heel of the exterior lower stocking piece. This is just to ensure that we work with the correct side in the next step. Take the upper curve (not lined up with the bottom of the stocking), and sew a line of gathering stitches along the outer edge. Gently pull on the bobbin thread to gather fabric. This will give you a nice curved edge for pressing. Turn gathered edge toward wrong side and press. Line the heel piece back up with the lower stocking piece, and sew around the pressed edge to secure into place. Repeat for other heel and lower stocking piece.

Add Pom-Pom Trim
Place the pom-pom trim along the top edge of the lower stocking piece. Baste-stitch to secure 1/4 inches away from edge.
Attach Upper Piece
Place the upper stocking piece right sides together with the lower stocking and pom-pom edge. Pin in place and sew. You may want to use a zipper foot on your sewing machine to get closer to the pom-pom edge. Press seam up, and edge-stitch. Repeat for other exterior stocking pieces.

Sew Together
Place the front and back external stocking pieces right sides together, matching up raw edges. Pin all around, and sew. Do not sew top stocking edge closed, just the sides.

Get a Smooth Finish
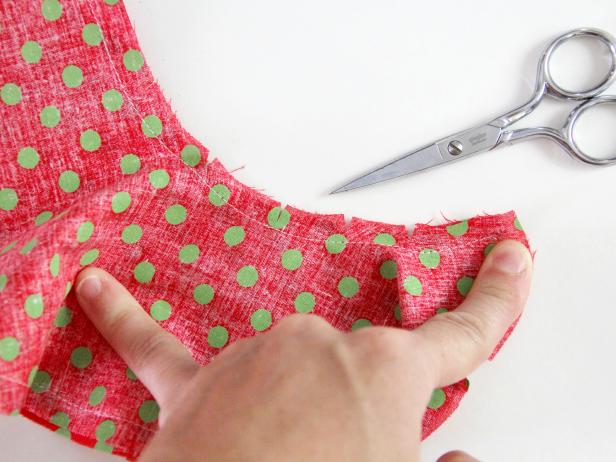
In order to ensure smooth, finished curves, you may want to clip your seam allowance (the area between the stitching and raw edge), especially in the curvy foot area. Simply snip a slight notch into your seam allowance (like in the image below), getting as close to the sewn line as possible without cutting it.
Add Lining
With the exterior stocking piece turned inside-out, use your hand or a blunt, pointy object to gently push all of the edges out inside of the stocking.
Slip the lining stocking around the outside of your exterior stocking with the right sides together. Match up the side seams along the top edge. Pin together, and sew around the top edge.

Turn Stocking Right-Side Out and Sew Up
Turn stocking right-side out through the bottom opening in your lining stocking on the foot. Sew the opening closed, and push the lining inside of the ruffle stocking. Once again, use a blunt pointed object to turn out the edges.

With Bells On
Use a needle and thread to hand-sew one of the bells to the pointed edge of the stocking's foot.

Create Loop
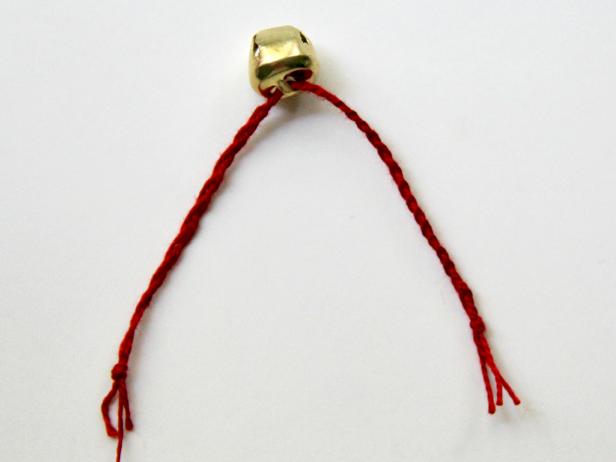
Cut three strands of embroidery thread, about 7 inches in length each. Knot them together at one end, and then braid. When you get to the bottom, tie another knot to secure.

Add Bell
Slip one bell on the braid, bringing it up to the center.
Finishes Touches
Bring the braided ends together to create a loop. Secure with a pin to the inside back seam of your stocking. Sew a small straight line directly over your braided ends, securing them to the stocking. Go back and forth over this sewn line a few times to really hold it in place.
Feel free to get fancy with your elf stocking, personalizing it with embroidery, applique or fabric markers.


